Last year, I went classic with the strawberry jam, so I wanted to try something a little different this year. But not, like, crazy different* and still a sweet breakfasty jam. The mint that grows like crazy along the side of our house gave me the inspiration. I basically used the recipe out of the Certo box, with two major adjustments. I added the mint, and I water bath canned it.
The Certo recipe recommends pre-sterilizing the jars in the oven, then ladling piping hot jam into hot jars with hot lids. As they cool, they seal. I've done it, and it works just fine. The truth is, though, I already had the canner out and the water heating before I looked at the instructions. At that point, I figured I might as well use it.
I originally thought about using some lemon juice to bring a little tang to the party, but then I decided not to. Good story, huh?
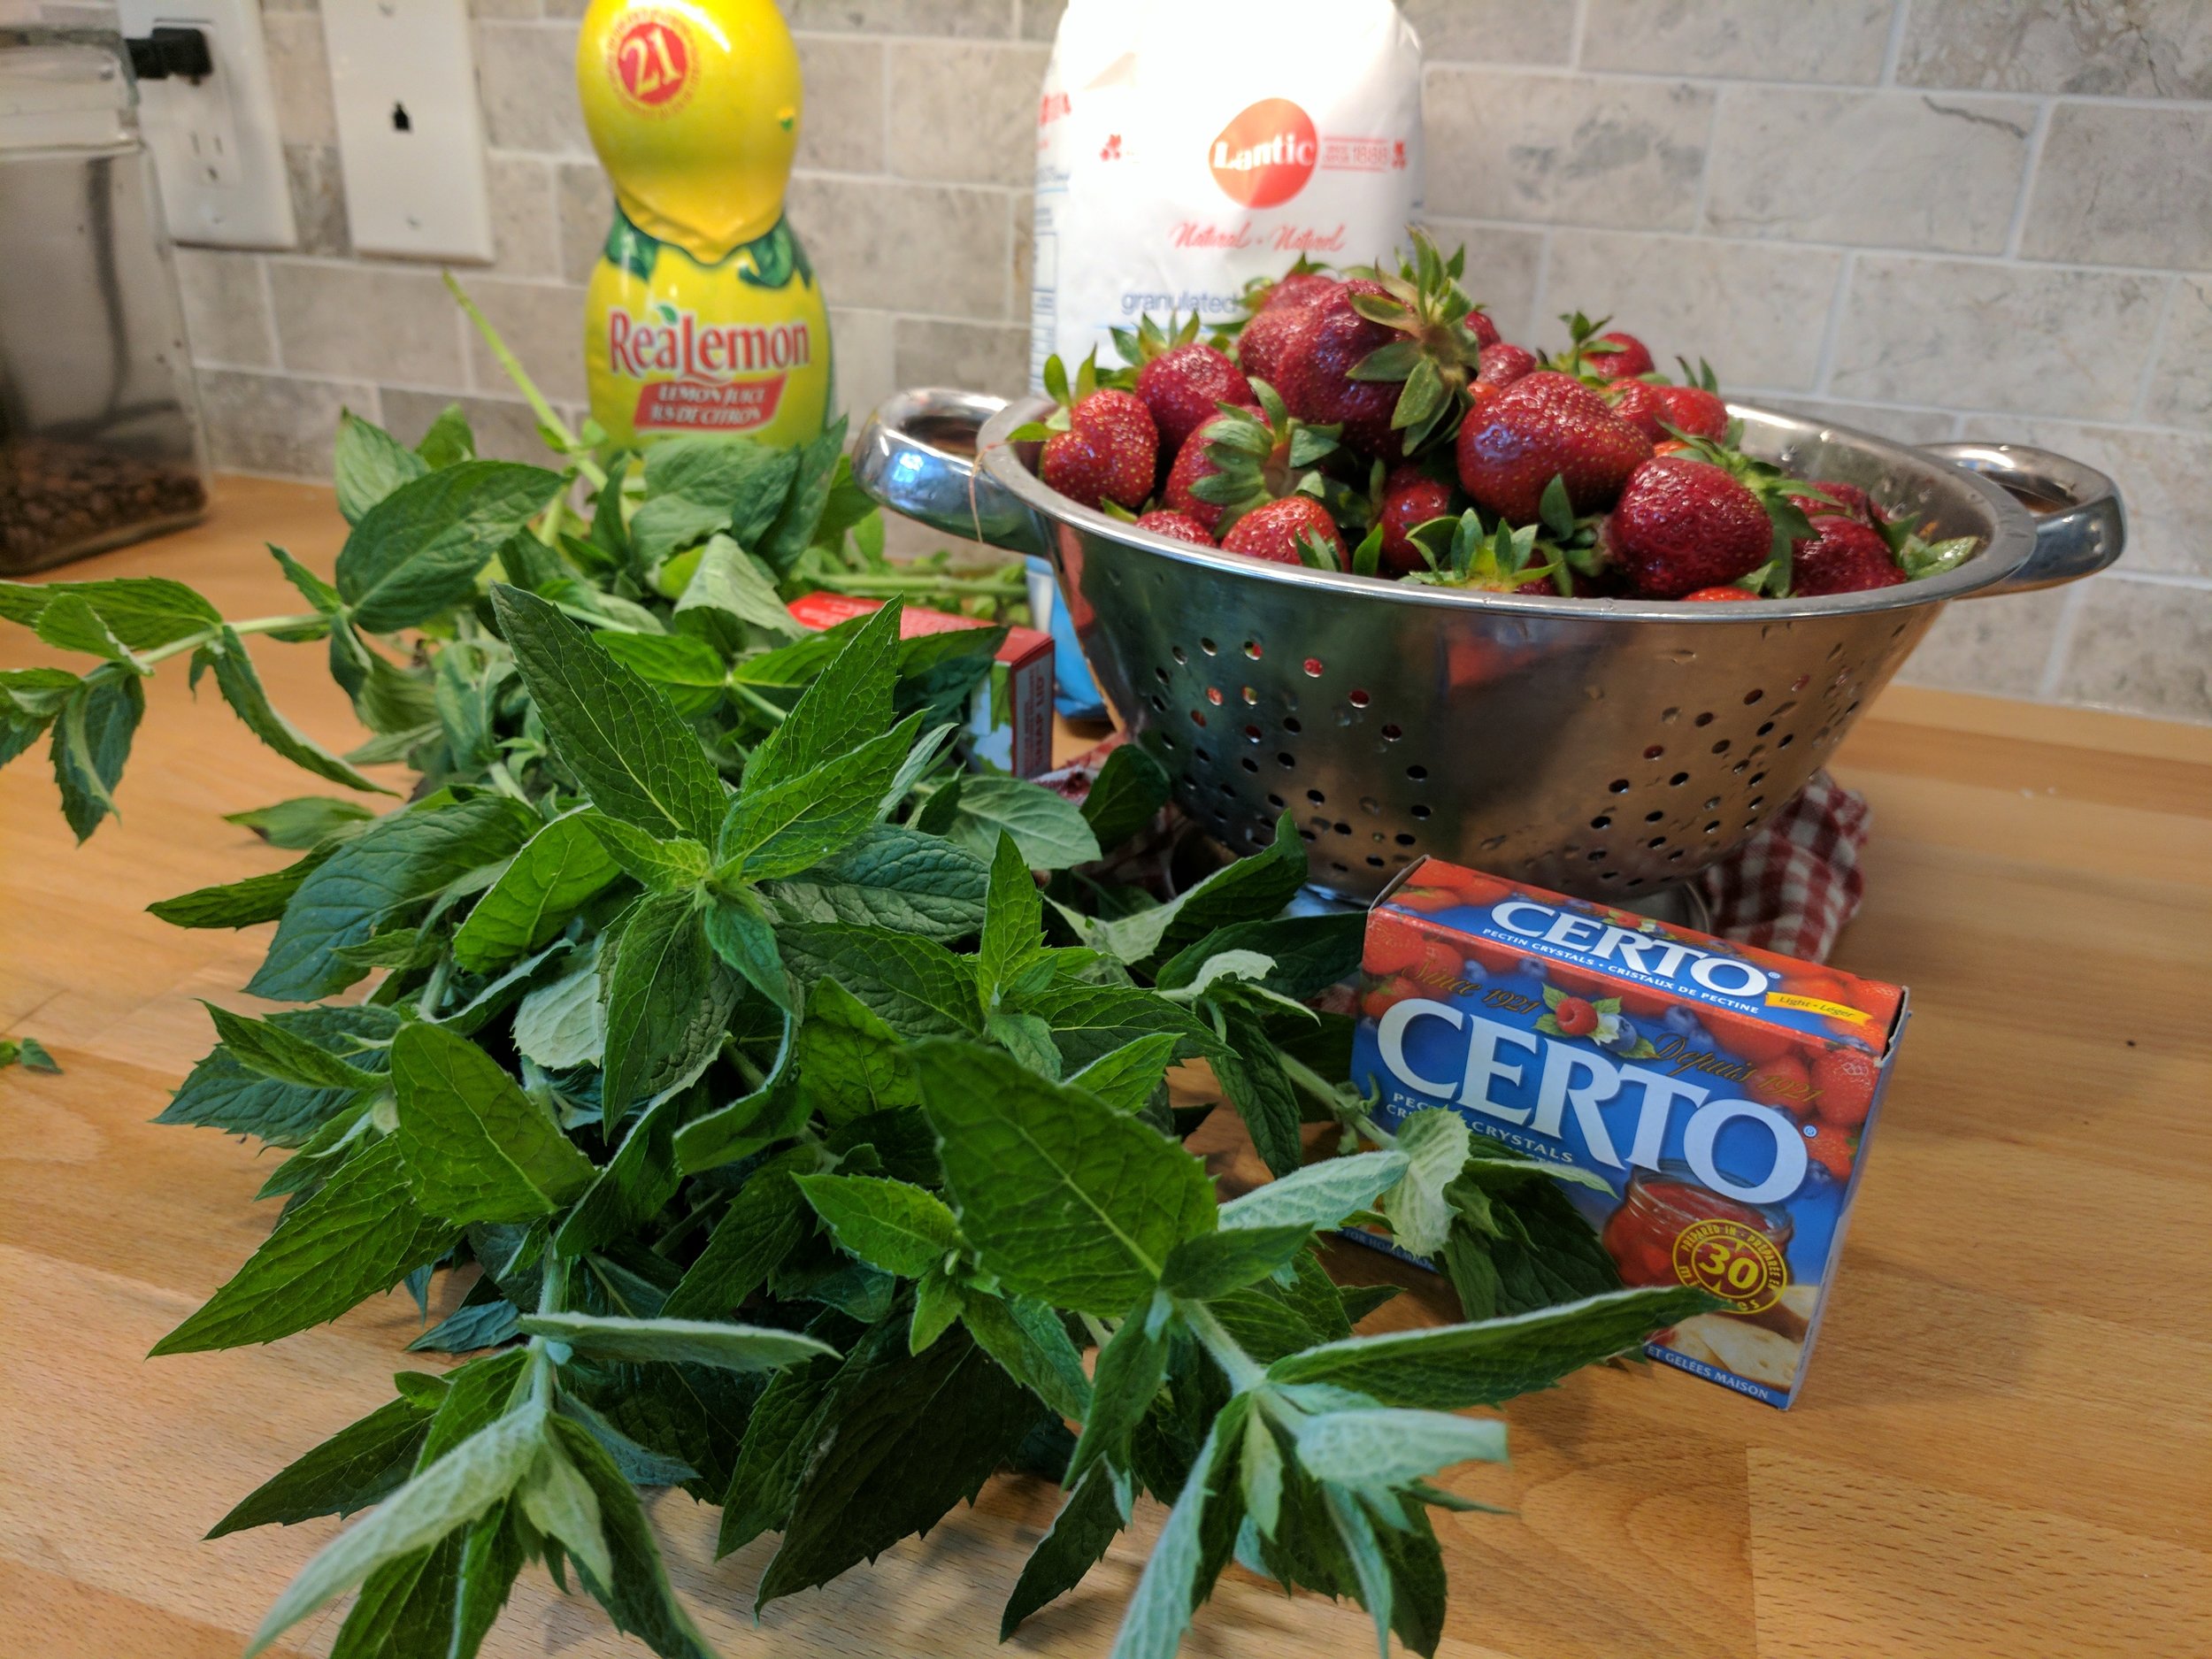
You'll need:
6 cups prepared strawberries (about 3L basket)
4 1/2 cups white sugar
1 pkg (57 g box) light pectin (Certo Light)
1/2 cup fresh mint, chopped fine
8 half-pint (250 ml) Mason jars or
Equivalent number of snap lids and rings
Directions for cooking and canning:

Wash your Mason jars in hot soapy water. Rinse well. I've probably never going to not say this!
If you're going to use a water bath, start heating your water now. Add a splash of vinegar if your water is hard like ours in Waterloo. If you're not going to use a water bath, put your jars on a tray in 225F oven for at least 10 minutes. You can shut off the oven but leave the jars in there until you're ready to use them to keep them hot.
Wash and hull your berries. (This little strawberry hulling gadget from Lee Valley does a GREAT job. Yes, it's expensive for what it is. But every June I sing its praises.)
I mashed about 4 cups of strawberries with a potato masher and, just for funsies, sliced the remaining 2 cups into larger chunks.
Combine your packet of pectin with 1/4 cup of the sugar in a small bowl and mix it together well.
Put your strawberries and sugar/pectin mix in a large pot and bring to boil, stirring frequently.
Add remaining sugar and bring back to a boil, stirring constantly, for one minute. Remove from heat.
Put the snap lids in hot water to soften. It doesn't have to be boiling.
Continue to stir your berry mix frequently, skimming foam, for about 5 minutes. Do not discard the foam. It is delish, and you've earned it. (My kids always ask for the skims.)
Stir in finely chopped mint.
Quickly ladle hot jam into hot jars, using a wide mouth funnel. Leave 0.5 cm headspace. I had a little too much for 8 jars, but not nearly enough for a ninth. That's tomorrow's Father's Day breakfast jam. Dave's a lucky guy!
"Bubble" each jar with a skewer or chopstick to release any trapped air. Wipe each rim with a clean paper towel dipped in vinegar. Place the snap lid down and screw the ring on finger tip tight.
If you are not using a water bath, you are done. Leave them and listen for pops. Or put the jars into your water bath canner. Make sure there is at least an inch of water above the top of your jars. Put the canner lid on and return to the boil for 10 minutes. Don't start your timer until the water is boiling.
Remove jars from the canner or let them sit in the canner until everything calms down. Ta da! So gorgeous and so tasty.

Write here...

*I made strawberry-pineapple one year. It tasted grand, but the colour became a little, uh, off-putting after several months in the pantry. Live and learn!